 Block
BlockHow to Add a Grid on a image for Drawing (3 Methods)
Learn how to put a grid on any picture for drawing and sketching. Compare 3 proven grid methods, master coordinate mapping, and scale your artwork accurately.
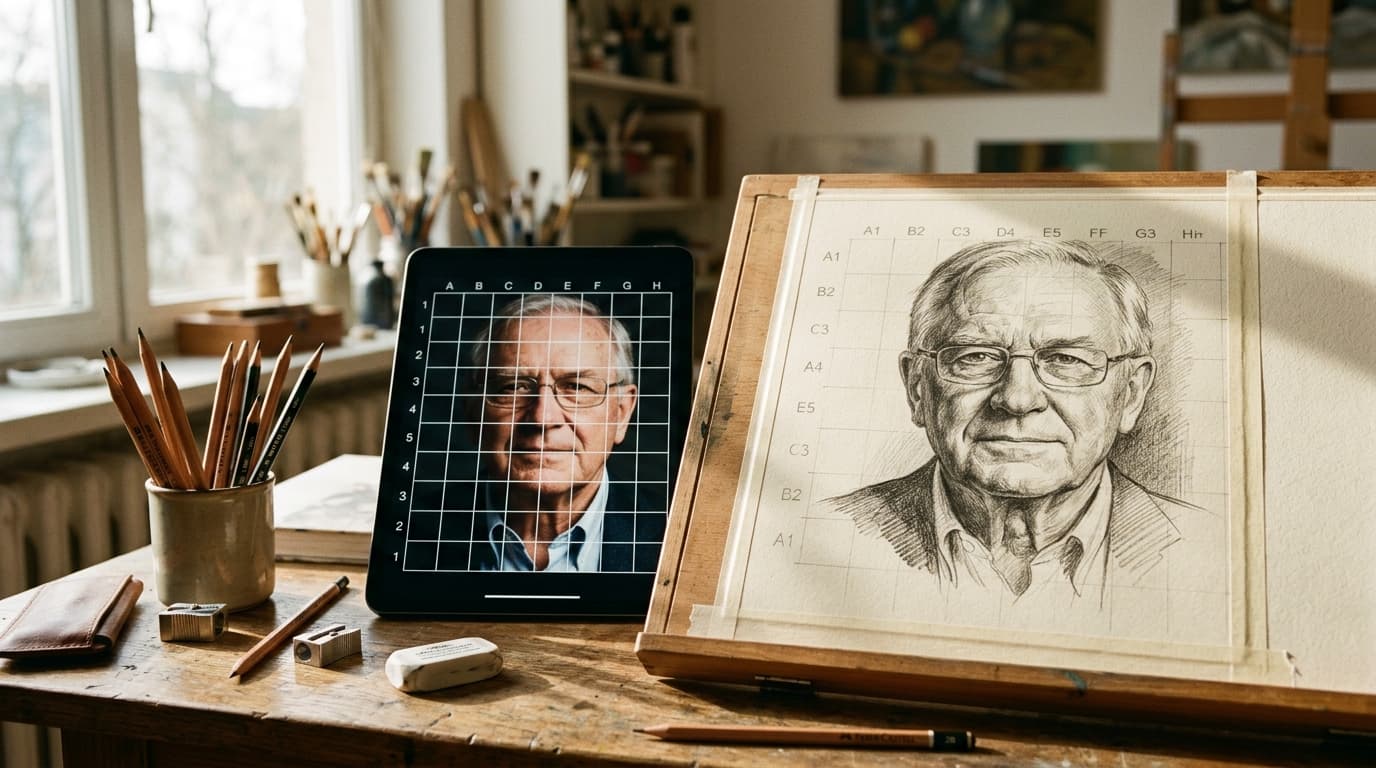
Transferring a reference photograph onto drawing paper with accurate proportions is one of the biggest challenges for artists of all levels. Whether you are sketching a realistic portrait, painting a pet on canvas, or drafting an architectural watercolor, facial features and perspective angles can easily drift out of alignment when drawn completely freehand.
The Grid Method is the time-tested artistic technique used for centuries—dating back to Renaissance masters like Leonardo da Vinci and Albrecht Dürer—to break down complex visual subjects into manageable, bite-sized squares. By focusing on the lines, angles, and negative shapes within one small square at a time, your brain stops overthinking the whole subject and captures true anatomical accuracy.
In this tutorial, we compare the three best ways to add a grid to any image for drawing, evaluate their pros and cons, and share practical artist tips for clean, accurate scaling.
3 Ways to Put a Grid on a Picture Compared
Depending on whether you work digitally or prefer traditional paper tools, here is how the three most popular grid methods compare:
| Method | Setup Time | Precision & Scaling | Impact on Original Photo | Best For |
|---|---|---|---|---|
| Method 1: Online Grid Tool (Grid Image Maker) | Under 10 seconds | 100% Mathematical (Auto-scales to any paper size) | Zero (Leaves source file untouched) | Digital artists, tablet sketchers, print-ready references |
| Method 2: Physical Ruler & Pencil | 10 – 20 minutes | Moderate (Risk of cumulative measurement error) | Destructive (Pencil/ink marks ruin photo printout) | Quick studio studies without a computer |
| Method 3: Clear Acetate Overlay Sheet | 5 – 10 minutes | Fixed Grid Only (Difficult to rescale non-standard photos) | Reusable (Protects underlying print) | Repetitive classroom exercises with uniform 1-inch grids |
Method 1: The Online Drawing Grid Generator (Fastest & Most Accurate)
The easiest, most versatile modern method is using a dedicated browser-based grid tool. Instead of doing tedious math with a handheld ruler, you can upload any digital photo and overlay a customizable grid in seconds.
Using Grid Image Maker, you can calibrate your reference image with features specifically tailored for artists:
Step 1: Upload Your Reference Photo
Drag your image into the workspace. Because the tool processes images directly in your browser, even 25MB high-resolution camera RAW or smartphone photos load instantly without server uploads or loss of detail.
Step 2: Set Your Grid Density & Short-Side Adaptation
Choose how many divisions you need. For quick landscape sketches, a loose 4×4 or 5×5 grid is sufficient. For intricate portraits where eye corners and lips require pinpoint accuracy, choose 8×8 or 10×10. The tool automatically adapts square cells based on the photo's short side, ensuring your grid squares remain perfectly square rather than stretched into rectangles.
Step 3: Enable Excel-Style Coordinate Labels
One of the most frustrating aspects of the traditional grid method is losing your place when looking back and forth between your paper and reference. Turning on Excel-style coordinates (A, B, C along the top and 1, 2, 3 down the side) assigns every cell a unique address (such as C4 for the pupil of the left eye). This eliminates eye strain and completely stops accidental row-skipping.
Step 4: Toggle Grayscale Mode for Value Checking
A common beginner trap is getting distracted by vivid colors and misjudging light versus shadow. Toggling the built-in Grayscale (B&W) mode strips away color data, instantly revealing pure tonal values, shadow edges, and highlight contrasts before you lay pencil to paper.
Step 5: Save or Print Your Gridded Reference
Download the gridded image directly to your tablet or print it on standard Letter/A4 paper to tape beside your drawing board.
Method 2: The Traditional Pencil & Ruler Method
If you are working away from digital devices with an existing physical photo printout, you can construct a grid manually using drafting tools:
- Calculate the Ratio: Measure the exact width and height of your reference print in inches or centimeters.
- Mark Increments: Use an acrylic ruler and a fine-tip mechanical pencil to place tick marks at regular intervals (for example, every 1 inch or 2 cm) along all four outer borders of the photo.
- Connect Opposing Ticks: Carefully align your ruler between opposing tick marks and draw straight horizontal and vertical lines across the photo.
- Number the Axes: Write numbers along the top edge and letters along the left margin to replicate coordinate tracking.
Note on Drawbacks: Measuring by hand carries a high risk of "cumulative error"—if your ruler slips by just 1 millimeter on each line, by column 8 your grid is nearly a centimeter off, creating noticeable facial distortions. Additionally, drawing ink or graphite directly over a prized family photograph permanently defaces it.
Method 3: Clear Acetate Sheet Overlay
The transparent acetate sheet method is popular in art schools and classical ateliers as a reusable middle ground:
- Purchase a pack of clear polyester or acetate sheets from an art supply store.
- Using a fine-point permanent archival marker (such as a Sakura Micron or Sharpie Ultra Fine) and a metal ruler, draw a permanent 1-inch or 2-centimeter grid onto the clear plastic sheet.
- Label the outer borders with letters and numbers.
- Whenever you want to sketch a photo, simply place the clear sheet on top of the physical print and secure the corners with removable painter's tape.
Limitations: While this preserves the original print, the grid size remains permanently fixed. If your drawing paper has a 3:4 aspect ratio but your photo is a 16:9 panorama, a rigid physical overlay cannot adapt its cell proportions, forcing awkward manual cropping.
Summary Checklist
- Choose digital grid generation for speed and precision: Tools like Grid Image Maker prevent ruler math errors and protect original photos.
- Always use A1/B2 coordinate labels: Labeling rows and columns prevents eye strain and eliminates missed squares.
- Check values with grayscale mode: Remove distracting colors to judge contrast, highlights, and deep shadows accurately.
- Keep paper grid lines ultra-light: Use hard 2H lead so grid marks erase cleanly under your final graphite or paint.
Overlay customizable grids, Excel-style coordinates, and grayscale filters on any photo for drawing.