 Block
BlockHow to Make a Block Poster?
A quick, practical step-by-step tutorial on turning any digital image into a giant multi-page wall poster using your home printer and Block Poster.
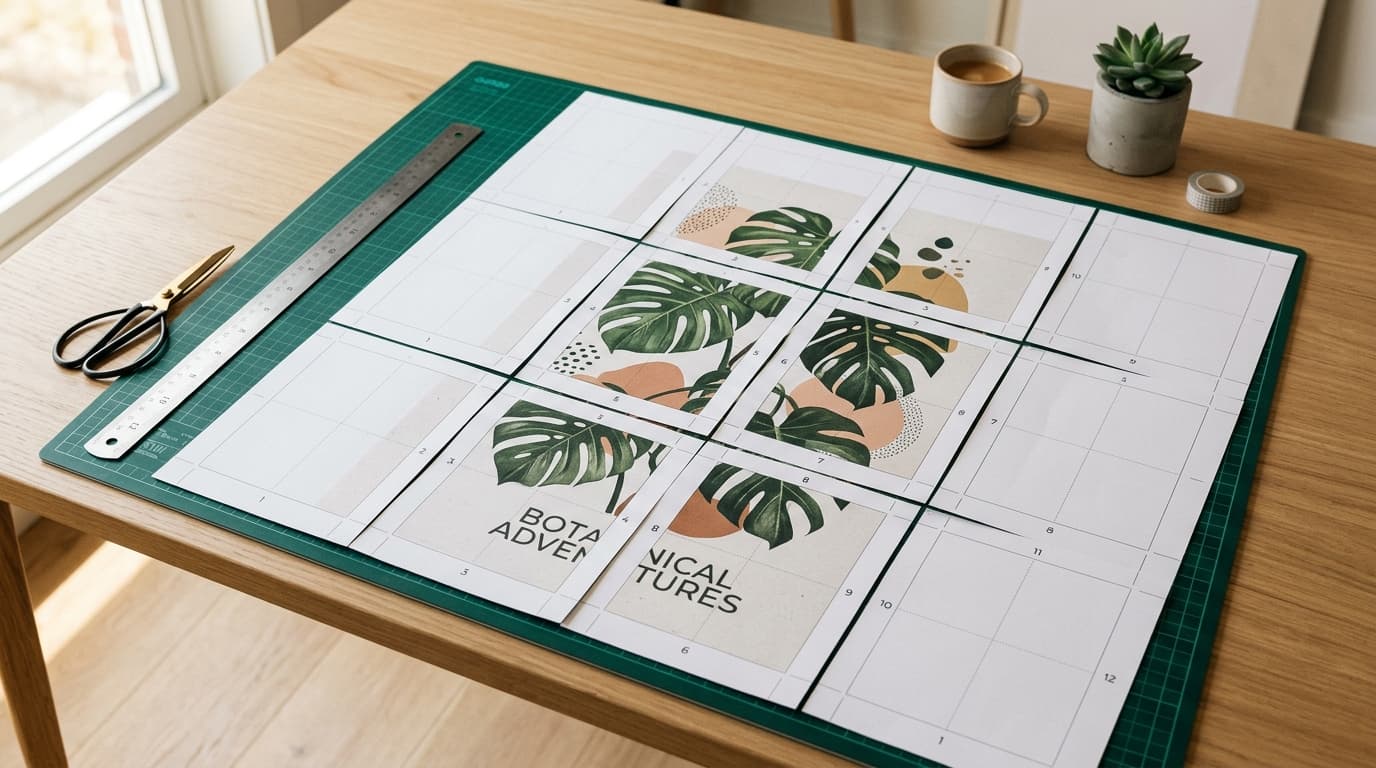
Want to turn a photo into a giant wall poster without buying expensive large-format prints? With Block Poster and a standard home printer, you can slice any image into a multi-page grid, print the sheets on standard A4 or US Letter paper, and assemble them into a stunning wall mural.
Here is the straightforward, step-by-step process.
Step 1: Upload Your Image
Go to Block Poster and drag your image into the workspace (or click to browse).
Because all image processing happens 100% locally in your browser, your photo is never uploaded to any server. There is no file-size limit, and your original quality is preserved.
Quick Resolution Tip: You don't need ultra-dense 300 DPI for wall art viewed from a few feet away. A standard 12–24 megapixel photo from any modern smartphone or camera is sharp enough for a 3-page or 4-page wide poster.
Step 2: Choose Paper Size, Orientation & Grid Width
In the control panel, configure your poster's layout:
- Paper Format: Select US Letter (North America) or A4 (international).
- Page Orientation: Choose Portrait or Landscape. Match this to your photo's general aspect ratio to minimize total sheets and seams.
- Pages Wide: Set how many pages wide you want your poster (e.g., 2, 3, 4, or 5 pages). The tool automatically calculates the vertical height and displays the finished physical dimensions in real time.
Step 3: Set Your Overlap Margin (5–10 mm)
Under the layout settings, set the Overlap Guideline slider to 5 mm to 10 mm.
Why overlap matters: Standard desktop printers have a slight 1–2 mm mechanical paper-feed variance. If you set overlap to 0 mm, any minor cutting error creates visible white gaps. Setting a 5–10 mm overlap prints duplicate margins and faint guide marks so sheets can easily overlap without gaps.
Step 4: Fine-Tune the Crop Box
Use the interactive handles on the image preview to position your crop:
- Check Seam Lines: Make sure grid lines don't run right across critical focal points, such as someone's eyes or small text.
- Nudge Placement: Shifting the crop window slightly left or right can easily move a seam to an empty background area.
Step 5: Download and Print at 100% Scale
Click Download Block Poster PDF. Within seconds, your multi-page PDF is generated locally.
When printing the PDF, check these crucial printer dialog settings:
- Scale / Page Sizing: Must be set to 100% (Actual Size). Never choose "Fit to Printable Area" or "Shrink to Fit", as scaling will distort the overlap calculations.
- Paper Quality: Standard 20 lb copy paper works, but 24–28 lb presentation paper or light cardstock yields richer colors and prevents glue ripples.
Step 6: Assemble the Poster
Clear a flat table or floor space and grab a craft knife (or scissors), a ruler, and a glue stick.
The "One-Edge Only" Trimming Method:
- Sort the Pages: Arrange the printed sheets in order. Block Poster prints subtle row and column numbers on margins for easy sorting.
- Trim One Side Only: Do not trim both adjoining pages!
- On the left page, cut off the white margin along the boundary line.
- On the right page, keep the overlap tab intact.
- Glue by Rows: Apply glue stick to the overlap tab, align the guide marks, and press together. Build complete horizontal rows first.
- Join the Rows: Once rows are dry, trim the bottom edge of Row 1, apply glue to the top tab of Row 2, and join them vertically.
Step 7: Mount on Your Wall
- Flatten First: Place assembled rows or the whole poster under heavy books for 15–20 minutes to cure glue bonds completely flat.
- Temporary Mounting: Use blue painter's tape or removable mounting putty (sticky tack) on all corners and seam intersections.
- Sturdy Board Display: Spray-glue the poster onto a lightweight foam core board for a rigid, framed look.